It is possible to import pictures of your ingredients into Resort Restaurant. Pictures that you import will then be displayed in the Picture page within the Ingredient form.
Resort Restaurant supports pictures in the file formats listed below:
•JPEG files
•GIF files
•PNG files
•BMP files
•PCX files
•TIF files
•TGA files
•WMF files
To import a picture into an ingredient:
First you will need to open the Ingredient form.
This can be done by choosing one of the following methods:
•Click on the ![]() toolbar button or
toolbar button or
•Select Forms->Ingredients from the menu bar or
•Click on the ![]() icon on the left-hand browser pane of your database form.
icon on the left-hand browser pane of your database form.
Select the ingredient you wish to add the picture to, using the browser pane.
Once you have selected the ingredient, open the Picture page. See the following image.
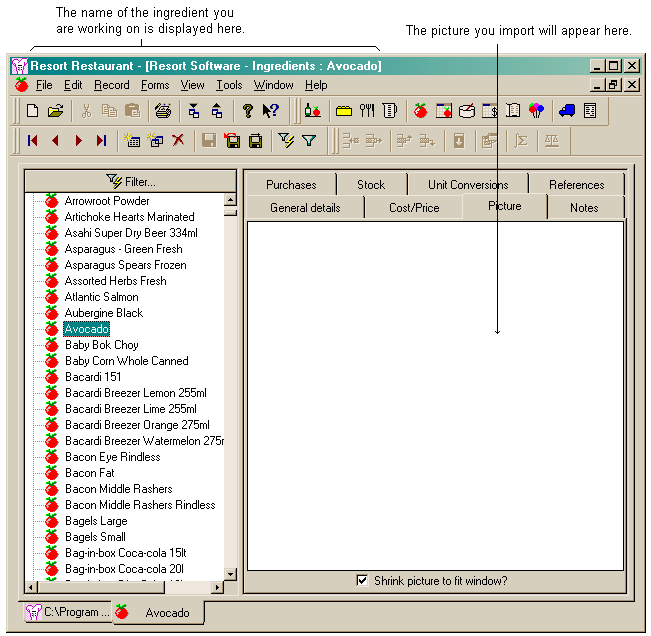
When the Picture page is open, there will be a large amount of screen area blank. This area is where your imported picture will appear. You will need to click within the blank picture screen to select the area to import to.
To import the picture, use one of the following methods:
•Select File->Import from the menu bar or
•Click on the ![]() toolbar button or
toolbar button or
•Right-click within the picture tab and select "Import picture..." from the context menu or
•Copy and paste a picture from the Windows clipboard. See note at the bottom of the page or the help topic on Pictures for more information.
The dialog box that appears will ask you to find the picture file that you wish to import. See the following image.

NOTE: If the Import Wizard is displayed when you select File->Import, close the wizard, click on the picture area on screen and select File->Import again.
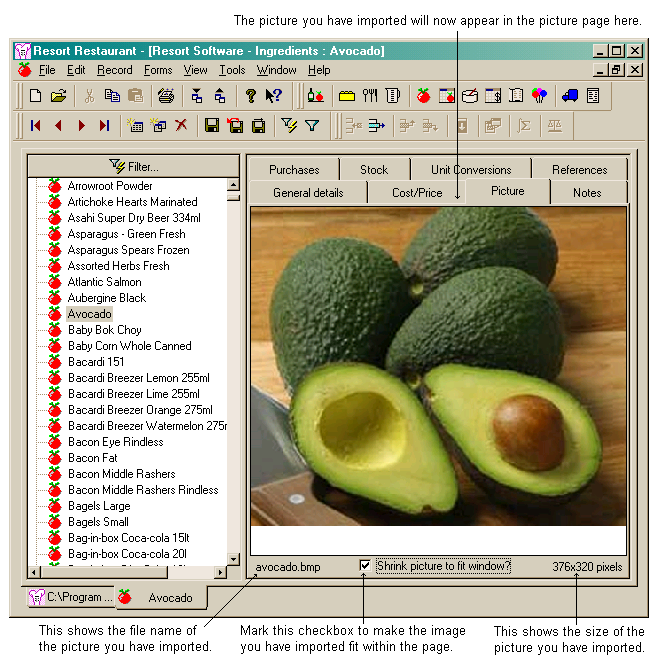
The picture you selected to import will now appear in the picture page of the ingredient form.
See the following image.
To delete a picture, select the picture (by clicking on it) and press the delete key on your keyboard, or right-click your mouse and select "delete" from the context menu. You will be asked to verify whether to delete the picture.
The picture context menu
The picture context menu will appear if you right-click your mouse in the picture tab. See the following image.
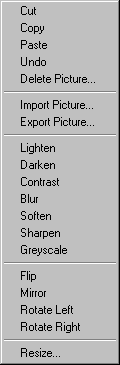
From the picture context menu the following options are available:
•Copy
•Undo
•Delete Picture
•Import Picture
•Export Picture
•Lighten
•Darken
•Contrast
•Blur
•Soften
•Sharpen
•Greyscale
•Flip
•Mirror
•Rotate Left
•Rotate Right
•Resize
Copy
Copies the selected picture to the clipboard.
Undo
Reverses the last command performed. The program remembers the last eight (8) changes made to an image, thus up to eight (8) changes can be undone.
Delete Picture
Selecting this option will delete the current picture.
Import Picture
Selecting this option will allow you to import a picture into the current item.
Export Picture
Selecting this option will allow you to export the current picture and save it to a selected file on your computer.
Lighten
Lightens the picture within the picture page of a selected form.
Darken
Darkens the picture within the picture page of a selected form.
Contrast
Increases the contrast of a picture within the picture page of a selected form.
Blur
Blurs the picture within the picture page of a selected form.
Soften
Softens the picture within the picture page of a selected form.
Sharpen
Sharpens the picture within the picture page of a selected form.
Greyscale
Converts the picture within the picture page of a selected form from colour to a monochrome image.
Flip
Flips the picture within the picture page of a selected form about the horizontal axis (i.e. turns the image upside down).
Mirror
Mirrors the picture within the picture page of a selected form about the vertical axis (i.e. swaps the image left to right).
Rotate Left
Rotates the picture 90° to the left.
Rotate Right
Rotates the picture 90° to the right.
Resize
Launches the Resize picture dialog. This allows you to manipulate the size of the picture within the picture page of a selected form and preview the results before accepting any changes made.
Note: Copying and pasting pictures from the Windows clipboard
There are a number of ways to copy and paste a picture from the Windows clipboard. Should you find a picture that you wish to import to an ingredient, you can use one of the following methods to do so.
From an displayed image (a picture on the internet or within a graphics program):
•Right click on the image and select copy, then right click in the blank picture section of your ingredient and select paste. This will paste the image into the picture page of the selected ingredient or
•Select the picture you wish to copy and use the CTRL + C (copy) shortcut, then click in the blank picture section of your ingredient and use the CTRL + V (paste) shortcut. The image will then be displayed on the picture page of the selected ingredient.
For more help on methods of importing pictures, see the Pictures topic.