The merge menus dialog allows you to merge multiple menus into a single menu. It is possible that you may at some point, require several menus to be combined into one larger menu. The merge menu dialog allows you to combine all of these menus into a single menu and then delete those that you no longer need. This is a very effective way of tidying up superfluous data within your database and thus reducing your database file size.
The merge menus dialog will be displayed if you perform one of the following:
•Click the ![]() toolbar button or
toolbar button or
•Select Merge/Bulk delete->Merge menus from the Tools Menu.
Resort Restaurant will ask you if you wish to perform a database snapshot before you begin the merge process. This will take a backup of your database before any changes are made so you can revert back to the saved copy if you are not happy with your changes. Select "Yes" to take a snapshot or "No" to continue straight to the merge menus dialog. See the following image.
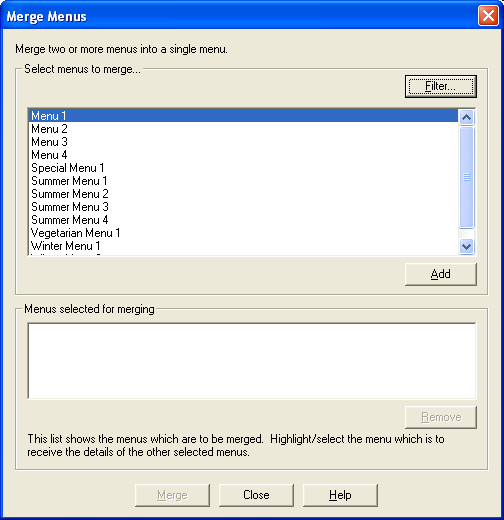
The dialog is separated into two main sections. They are the "Select menus to merge" section and the "menus selected for merging" section.
Select menus to merge
From this section you can select the menus you would like to merge. When the dialog first appears, this section will display all menus in your database in alphabetical order. If you don't want to view all menus, but rather a selection of menus you can use the "Filter" button to filter menus.
Using the Filter button
The Filter button will allow you to search for menus by the following:
•Menu Name
•Menus in a selected Category
•Menus from a selected Outlet
•Menus using a particular ingredient or recipe
•Incomplete menus
•Menus modified before or after a certain date
Make your selection in the Filter dialog and those menus you have selected to view will be displayed in the browser list. For more information on filtering menus see the Filtering menus help topic.
Merging menus
You can now select the menus you wish to merge together as well as selecting which menu you wish to keep, and those you wish to delete from your database.
To select the menus to merge together, double click on the menu name or highlight the name and click the "Add" button. This will add the selected menu into the menus selected for merging section. Repeat this until all the menus you wish to merge into one are displayed in the menus selected for merging section. See the following image.
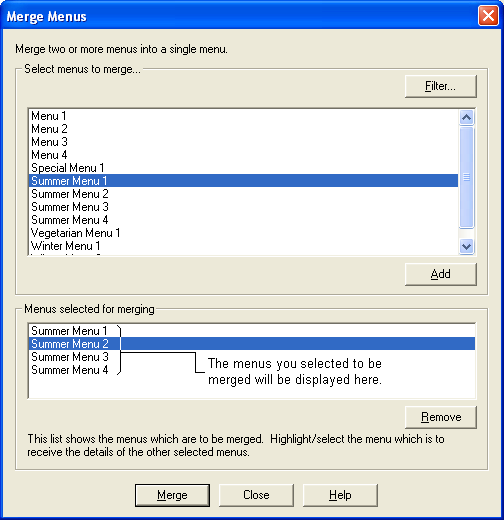
Menus selected for merging section
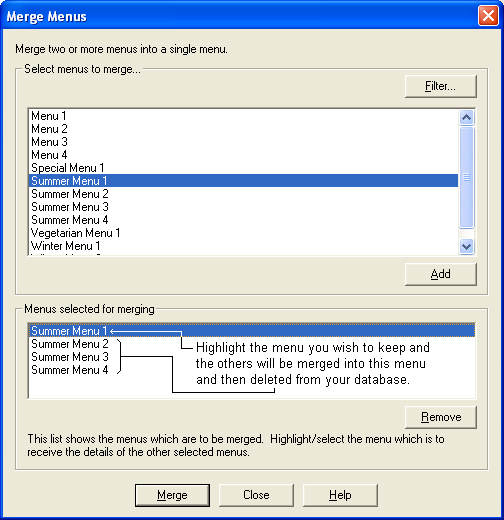
From this section, once you have selected all those menus you wish to merge into one, you must now choose which menu you would like to merge all the others into. This process will keep the menu you have selected, combining all the information from the other menus listed, such as any recipes, ingredients, quantities and unit conversions associated with the other menus in the list. It will also delete those menus you have chosen to merge, from your database. See the following image.
Once you've selected the menu to keep, click the "Merge" button to begin the merge process. A dialog will appear to confirm the merge options you have selected. See the following image.
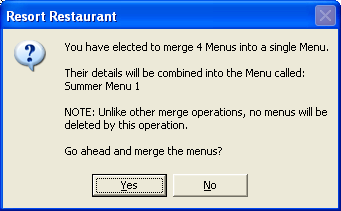
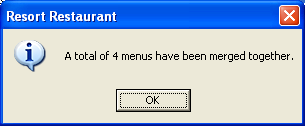
If you wish to alter your merge selections, click the "No" button. If the details are correct, click the "Yes" button and the merge will begin. Once complete, a dialog will appear to let you know if the merge was successful. See the following image.
Click the OK button. This will return you to the Merge menus dialog. If you wish to perform another merge you may do so. If you don't wish to merge any more menus, click the Close button and you will be returned to the last opened form.